금융프로젝트
[국민 은행 클론코딩][vue]메인 슬라이드
h-yujin
2022. 11. 10. 16:34
목표 화면
구현한 화면
컴포넌트 구조
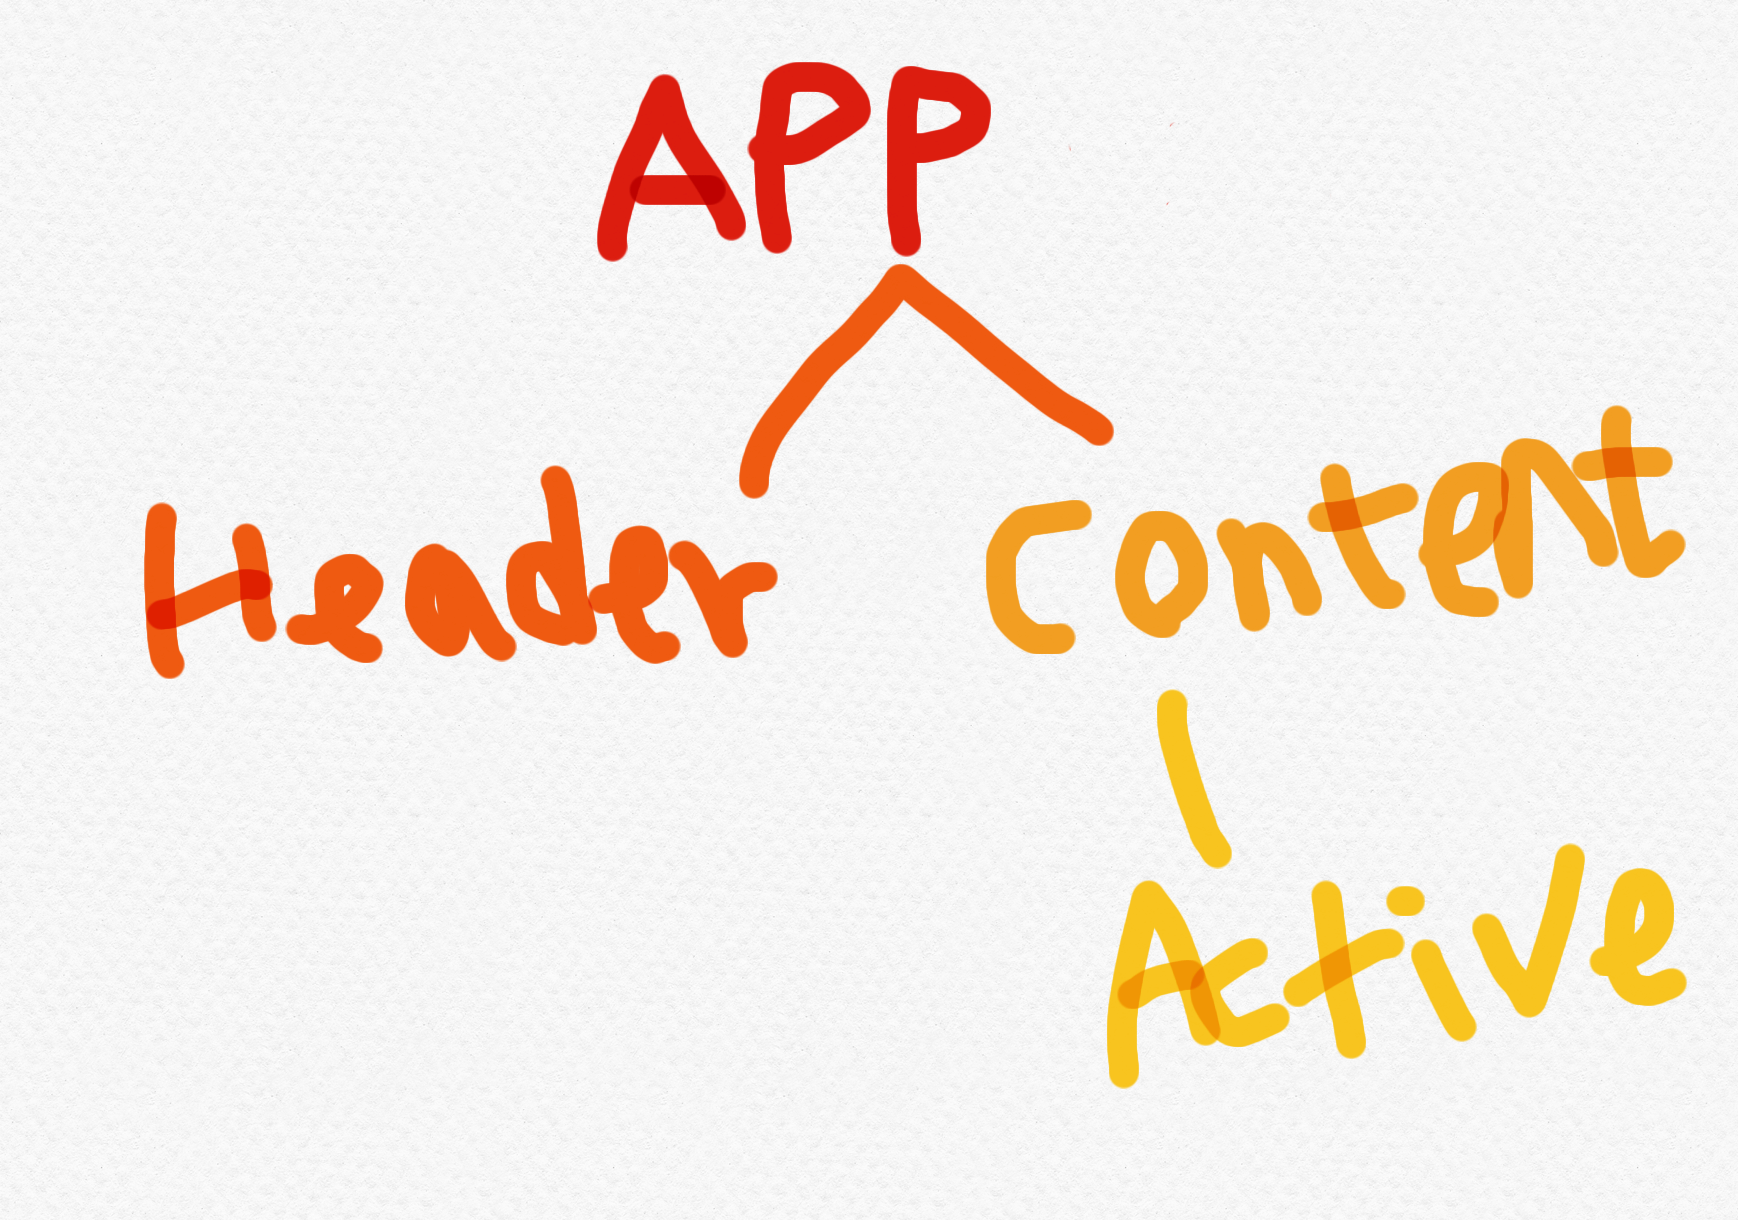
headerWrap.vue에 대해서는 전 기록물에 있다.
ActiveWrap.vue
- template
<template>
    <div class="wrap-visual active1">
        <div class="area-con">
            <ul>
                <li class="section section1">
                    <div>
                        <strong><img src="https://www.kbstar.com/2018/img/visual/visual_section79_v2_tit01.png"></strong>
                        <span>
                            <img src="https://www.kbstar.com/2018/img/visual/visual_section79_v2_tit02_2.png">
                        </span>
                    </div>
                </li>
            </ul>
        </div>
    </div>
    <div class="wrap-visual active2"></div>
    <div class="wrap-visual active3"></div>

</template>
section section1 클래스는 opacity:0,visiblity:hidden으로 로드 직 후에는 보이지 않는 상태다.
이 클래스에 opacity:1,visiblity:visible인 style속성을 가지는 ‘on’이라는 style속성을 부여해야한다.
- style
.wrap-visual .area-con > ul > li {
    position: absolute;
    left: 0;
    top: 0;
    opacity:0;
    z-index:-1;
    color: #333;
    visibility: hidden;
}
.wrap-visual .area-con > ul > li.on {
    z-index: 0;
    visibility: visible;
    opacity: 1;
}
- script
setTimeout(() => {
    document.querySelector(".area-con ul").childNodes.forEach(n=>{
        n.className+=" on";
    });
}, 1000);
페이지가 로드된 후 1초 후에 해당 태그에 ‘on’이라는 클래스를 부여했다.
주의할 점은 className+=”[띄어쓰기]on”이라는 점이다. 꼭 띄어쓰기를 해야한다.
해당 클래스의 자식 태그인 strong과 span 또한 opacity가 0이므로 1로 변경해 주어야 한다.
여기서 움직이는 효과를 더하기 위해 marginLeft도 변경해준다.
- style
.wrap-visual .area-con > ul > li > div > strong {
    display: block;
    font-size: 40px;
    line-height: 52px;
    font-weight: normal;
    letter-spacing: -4px;
}
.wrap-visual .area-con > ul > li > div > span {
    font-size: 19px;
    line-height: 28px;
    color: #5c5c5c;
}
.wrap-visual .area-con > ul > li > div > span, .wrap-visual .area-con > ul > li > div > strong, .wrap-visual .area-con > ul > li > div > a.link {
    display: block;
    opacity: 0;
    margin-left: 30px;
    -webkit-transition: all 0.6s;
    transition: all 0.6s;
}
- script
setTimeout(() => {
    document.querySelector(".area-con ul").childNodes.forEach(n=>{
        n.className+=" on";

        n.childNodes[0].childNodes.forEach(h=>{
            h.style.opacity="1";
            h.style.marginLeft="20px";
        })
    });
}, 1000);
초기 margin-left값이 30px에서 20px로 -10px이동한다.
:before :after 활용 슬라이드
클래스 ‘on’이 부여되면서 section section1클래스의 :before, :after속성에 부여된 백그라운드이미지를 보여줘야한다. 두 가상 태그 또한 opacity:0이므로 초기에는 보이지 않는다.
- 초기 style
.wrap-visual .area-con > ul > li:before, .wrap-visual .area-con > ul > li:after {
    content: '';
    display: block;
    position: absolute;
    right: 30px;
    bottom: -40px;
    width: 640px;
    height: 401px;
    opacity: 0;
    -webkit-transition: all 1.5s;
    transition: all 1.5s;
}
.wrap-visual .area-con > ul > li.section1:before {
    background: url(../assets/visual_section79_1.png) no-repeat 100% 0;
}

.wrap-visual .area-con > ul > li.section1:after {
    background: url(../assets/visual_section79_2.png) no-repeat 100% 0;
}
.wrap-visual .area-con > ul > li:after {
    bottom: 0;
    opacity: inherit;
}
- 클래스 ‘on’이 부여된 후 style
.wrap-visual .area-con > ul > li.on:before {
    bottom: 0;
    opacity: 1;
}
이렇게 ‘on’에 가상 태그 before를 붙여주어 애니메이션을 구현할 수 있다.
전체 코드
- ActiveWrap.vue
<template>
    <div class="wrap-visual active1">
        <div class="area-con">
            <ul>
                <li class="section section1">
                    <div>
                        <strong><img src="https://www.kbstar.com/2018/img/visual/visual_section79_v2_tit01.png"></strong>
                        <span>
                            <img src="https://www.kbstar.com/2018/img/visual/visual_section79_v2_tit02_2.png">
                        </span>
                    </div>
                </li>
            </ul>
        </div>
    </div>
    <div class="wrap-visual active2"></div>
    <div class="wrap-visual active3"></div>

</template>

export default {
  name: 'ActiveWrap',
methods:{
},
}
setTimeout(() => {
    document.querySelector(".area-con ul").childNodes.forEach(n=>{
        n.className+=" on";

        n.childNodes[0].childNodes.forEach(h=>{
            h.style.opacity="1";
            h.style.marginLeft="20px";
        })
    });
}, 1000);- ContentWrap.vue
<template>
    <div id="content">
      <active-wrap></active-wrap>
    </div>
</template>
<script>
import ActiveWrap from './ActiveWrap.vue';

export default {
  components: { ActiveWrap },
  name: 'ContentWrap',

}
</script>
<style>
#content{
  min-height: calc(100vh - 220px);
    margin: -70px auto 0;
    padding: 0 0 55px;
}
</style>
- App.vue
<template>
  <div class="wrapAll">
    <header-wrap></header-wrap>
    <content-wrap></content-wrap>
  </div>
</template>

<script>
import ContentWrap from './components/ContentWrap.vue';
import HeaderWrap from './components/HeaderWrap.vue';

export default {
  name: 'App',
  data:()=>{
    return {
      number:0
    }
  },
  methods:{
    addNumber(){
      this.number++;
    }
  },
  components:{
    HeaderWrap,
    ContentWrap
  }
}
</script>

<style>

#app {
  color: #5a5a5a;
    font-size: 0.875em;
    line-height: 1.5;
    font-family: '맑은 고딕', 'Malgun Gothic','돋움',Dotum,AppleSDGothic,Tahoma,Helvetica,sans-serif;
    height: 100%;
    display: block;
}
html, body, div, span, object, iframe, h1, h2, h3, h4, h5, h6, p, blockquote, pre, a, abbr, acronym, address, big, cite, code, del, dfn, em, img, strong, sub, sup, var, b, u, i, center, dl, dt, dd, ol, ul, li, fieldset, form, label, legend, table, caption, tbody, tfoot, thead, tr, th, td, embed, input, select, textarea, button{
  margin: 0;
    padding: 0;

}
h1, h2, h3, h4, h5, h6{
  font-size: 1em;
    font-family: '맑은 고딕', 'Malgun Gothic','돋움',Dotum,AppleSDGothic,Tahoma,Helvetica,sans-serif;
}
a, em, label, span, strong, button{
  display: inline-block;
}
a{
  cursor: pointer;
}
a:visited{

  color: #5a5a5a;
    text-decoration: none;
}
h1{

  font-weight: bold;
}
ul {
    display: block;
    list-style-type: disc;
    margin-block-start: 1em;
    margin-block-end: 1em;
    margin-inline-start: 0px;
    margin-inline-end: 0px;
    padding-inline-start: 40px;
}
li {
    display: list-item;
    list-style-type: none;
    text-align: -webkit-match-parent;
}
</style>